
How to Replace the Main Wire in Beats Solo 2 Wired Headphones (Right Side Not Working)
If the right side of your Solo 2 wired headphones has stopped working, there is a good chance that you need a new main wire. The main wire runs from one side of the headphones to the other and is a common failure point for the Solo 2 wired headphones.
If you would prefer to read a written repair guide, check that out below. Or if the tool cost seems prohibitive for a one time repair and you would prefer that we complete this repair for you, check out our Repair Catalog to see if we offer repair services for this device.
Are you a business? We offer wholesale discounts on our repair services if you are sending numerous units in for repair or want to send us continuing batches of devices for repair on a regular basis. Contact our support team for more info Info@JoesGE.com (This email is only for wholesale inquiries, please contact Support@JoesGE.com for other inquiries).
_____________________________________________
Repair Difficulty: Difficult
Time to complete: 1-2 hours (this repair is very time consuming so make sure that you have enough time to complete the repair and not be in a hurry).
The tools and parts that you will need for this repair:
- A New Main Wire
- Pry Tool (your fingernail, a guitar pick, or the dull side of a butter knife can also do the trick)
- A soldering iron (around 15 watts is good for small electronics and would be cheaper than purchasing a temperature variable unit).
- Solder Flux (To ensure clean solder joints)
- A Small Phillips Screwdriver
- A Small Flat Edge Screwdriver
- Some Precision Tweezers (Only necessary if the hinge pins fall out)
- Some T8000 Glue
_____________________________________________
1. Remove the earpad
***Sometimes the issue can be caused by a faulty speaker which you can check by removing both speakers and swapping them to the opposite sides. If the speaker from the non-working side of the headphones works on the side that was working, you have a faulty wire, if the speaker does not work, you have a faulty speaker.
Insert your pry tool into the small gap between the leather of the earpad and the plastic of the speaker housing then pry up. Repeat this process around the entirety of the earpad until you can pull it off with your hands.


Remove any excess adhesive that is on the speaker housing or earpad.
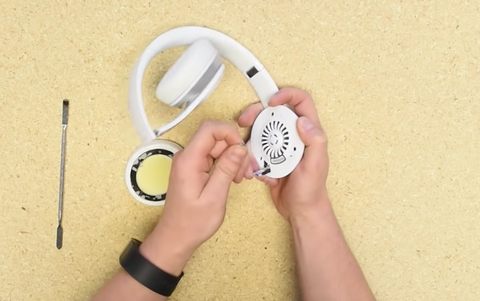

2. Remove the speaker and housing
Remove the screws that hold the speaker into the headphones then pull the speaker up and out of the headphones.

Desolder the wire from the contacts on the speaker driver. The main wire usually rips at the point where it runs through a small hole in the plastic housing so your wire might already be ripped and loose.

Remove the black circular sticker from the center of the housing to reveal a single Phillips screw. Remove that screw to allow the back of the speaker housing to become loose.


Using a dull ended pry tool or something similar, push the rubber tabs out of the plastic housing so that you can remove the housing.


Using your Small Phillips Screwdriver enlarge the hole that the wire was running through in the speaker housing. This will prevent the wire from being worn down by the housing in the future.

Remove the four screws that hold the rubber mesh onto the inside panel, then remove the mesh from the panel and set it aside.

3. Remove the inside and outside panels and hinges
Insert your pry tool (or just use your fingernails) into the gap between the two panels that make up one side of the headphones. You want to start prying them apart on the side of the round part of the headphones then work your way around the rest of the round part.

Hold the two panels apart with your thumb then pry the straight part of the panels apart from each other.

Once again, using your Small Phillips Screwdriver enlarge the hole that the wire was running through in the inside panel by pushing the screwdriver all the way through the hole.

Pull the wire out and upward, away from the metal hinge extensions.

Lift up the edge of the rubber headband cushion using your Small Flat Edge Screwdriver to expose the two screws that hold the metal hinges onto the headband. Remove the two screws. These two screws are smaller than the other screws in the headphones so make sure to keep them separated.

The hinges should now freely slide away from the headband. There are two metal pins inside of the hinges that can fall out of place if you open and close the hinge while it is removed from the headband. If the pins do, fall out, you can use some Precision Tweezers to put them back in place.

4. Repeat the previous steps on the other side of the headphones
Now that you have removed an entire side of the headphones from the headband, repeat this process for the other side of the headphones before moving on to step 5.
5. Remove the headband cushion
The rubber headband cushion has small tabs at each end of it that are glued on to the plastic headband. Use your Small Flat Edge Screwdriver to cut through the adhesive and loosen the tabs.

The rubber headband has a plastic frame inside of it that clips onto the plastic headband. You can pop the plastic frame free by inserting your pry tool into the gap between the rubber and plastic then prying upwards. You will hear a click when the headband cushion has come free in that spot.

Once you have a corner of the cushion pried up, you can lift up the rest of it using your fingers.

6. Remove the wire
The wire should come off with the headband cushion, however, if it does not, simply pull it out and upward to remove it cleanly from the headband.
Clean any leftover adhesive or rubber wire shielding from the headband and the area where the rubber tabs were glued in place.

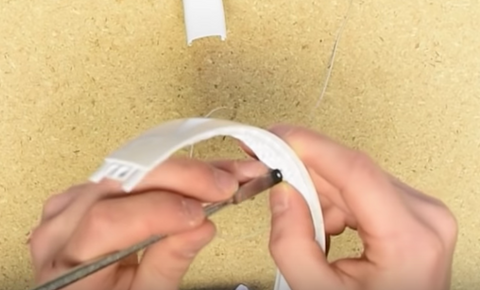
7. Install a new wire
The wire needs to be about 2-3 inches longer on the left side of the headphones than it does on the right so you want to start by folding the wire in half then give a couple of extra inches to the left side.

Place the midpoint of the wire into the middle of the wire canal in the headband.

Once you have your slightly shifted middle marked, you want to apply a very small amount of super glue or B7000 Glue to the inside of the headband where the wire will sit. We usually put a small dot of glue on a flat edge screwdriver or pry tool and apply it to the wire channel. You do not need very much glue for this.

Repeat this process on both sides of the midpoint.
8. Install the headband cushion
Use some rubbing alcohol and a rag to clean any dirt off of the headband and headband cushion.
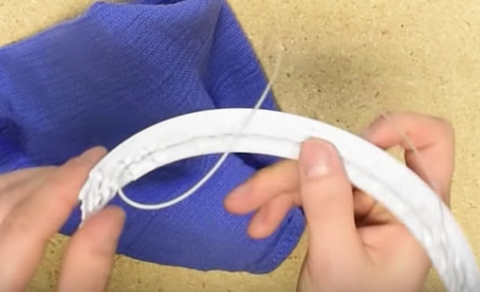
There is an arrow on the plastic frame of the headband cushion indicating the right side. Make sure to line the headband cushion and headband up with each other as they have a slight bend in them.

Installing the cushion is simple as it just clicks into place. Line up one end of the cushion with the headband and apply some pressure to it until you hear it click into place. Make sure to also press the rubber sides of the cushion in towards the center of the headband as you click it in place so that they do not stick out past the edges of the headband.

9. Install the hinges
Thread the main wire through the hole on each hinge, then slide the hinge up the wire and onto the plastic headband.


Insert the two screws that hold the hinge in its place into the hinge and headband underneath the headband cushion.

Using the same method as you used to secure the main wire to the headband, glue the wire to the canal in the metal hinge extension. Remember, you do not need to use much glue at all, the less glue the better.

Using a screwdriver or pry tool, bend the thin metal bump out of the hinge a bit more. This piece is used for the position locking click that you hear when you slide the hinge extension up and down. Don't push it super far, but give it an extra bit of exposure so that your hinge locking can be extra solid.

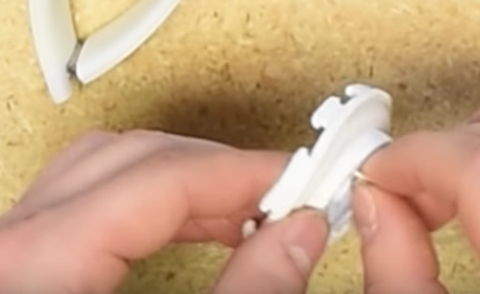
10. Install the inside and outside panels
Put the inside panel onto the metal hinge extension like so.

Run the wire through the hole in the inside panel that you enlarged previously.

Align the outside panel with the inside panel with the hinge extension midway extended then apply pressure to them to snap them together starting one side at a time near the top straight part of the panels.

Once the top of the panels is connected, slide them up and down on the metal hinge extension to make sure that they slide uninhibited by the wire.

Before snapping the panels entirely together, separate the round part of the two panels and make sure that the wire is not pinched in between the panels. It should go around the center round part of the panels.

Grab the rubber mesh and guide the wire through the smallest hole in the mesh.

Secure the mesh onto the inside panel with its four screws.

Slide the wire through the hole in the backside of the speaker housing then secure the speaker housing with its single, center screw and place the black circular sticker over the screw.


Using your pry tool (don't use anything sharp for this) push the rubber tabs of the mesh through the holes in the speaker housing. You can also use a set of pliers to pull the rubber tabs all the way through the holes once part of the tab is stick out. This will take some time and patience so go slow and be patient :)


Repeat this process for the other side of the headphones so that they look like this.

11. Install the speaker and earpad
Now you can resolder the wire to the right side speaker and the AUX port on the left side of the headphones. There are two different colored wires in the main wire, make sure that you run the same color of wire from the positive connection on the AUX port to the positive connection on the speaker.

Install the speakers back into the main housing and make sure that the wire is not pinched and the speaker sits flush with the housing before inserting the screws, then install the screws into each speaker housing to secure the speaker into place.

If you purchased New Replacement Earpads for your headphones, they would come with tape already installed on them. If you did not get new earpads, we sell the new wire in a kit that comes with two pieces of earpad tape Here. Install the new tape by removing one side of the adhesive cover and lining it up with the holes on the earpad. *If you have difficulty removing the paper backing on the tape, cut across it lightly with a razor blade then use the tip of the blade to peel up the backing.


Install the earpads with the seam in the leather facing straight down and use the two plastic pegs on the speaker housing to make sure that the earpad is properly seated. Then apply pressure evenly on the earpad for 30 seconds to ensure that it has been secured.

12. Get back to jamming out 🎶